Accessible Microsoft Word Documents
Microsoft Word provides various options for including accessibility information into the document to support individuals using assistive technologies. Such information also provides improved accessibility when converting the document into other formats (e.g., tagged PDF, EPUB, DAISY, etc.). Microsoft Word document accessibility can be improved for the following content items:
- Document Headings
- Descriptions for Images
- Tables for Data
- Multiple Columns
- Document Hyperlinks
- Mathematical Content
Document Headings
Headings can provide an organizational and navigational framework for a document’s content. Headings, when used appropriately, can be effective to communicating a document’s informational hierarchy and the relationship between different sections of content. For an individual using assistive technology, the presence of headings offers a simple mechanism to determine the organization of the content and to “jump” from heading to heading when navigating the document. Such headings can also be used as the navigational landmarks upon conversion into other formats, such as tagged PDF, HTML or EPUB.
Styles in MS Word 2010
- From the Home tab in the top ribbon, select the appropriate heading
- Headings should follow a logical structure that identifies content based on its importance in the document.
- Maintain a sequential organization for headings, e.g., avoid having a heading 2 before a heading 1.
- You can change the formatting of a heading by using the formatting palette.
 Screenshot of Styles ribbon and Styles formatting palette in Microsoft Word 2011 for
Mac.
Screenshot of Styles ribbon and Styles formatting palette in Microsoft Word 2011 for
Mac.
- From the Home tab in the top ribbon, select the appropriate heading level. You can also set headings from the Styles formatting
- Headings should follow a logical structure that identifies content based on its importance in the document.
- Maintain a sequential organization for headings, e.g., avoid having a heading 2 before a heading 1.
- You can change the formatting of a heading by using the formatting palette.
Description for Images
For images in MS Word, you can add a text description (also called “alt text”) that communicates the purpose and/or content of the image. This information is then communicated to individuals who cannot view the image using their assistive technology. Image descriptions should be short and communicate the main purpose of the image. If a longer description of the image is necessary to fully explain its content, consider inserting a more detailed description of the image within the document text that precedes and/or follows the image.
Image descriptions in MS Word 2010
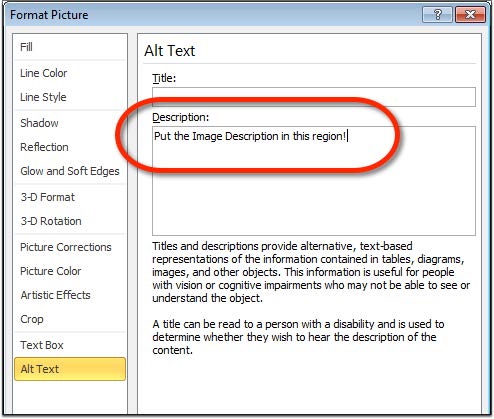 Screenshot of Format Picture window displaying the Alt Text interface and Description
region for Microsoft Word 2010.
Screenshot of Format Picture window displaying the Alt Text interface and Description
region for Microsoft Word 2010.
- From the Insert ribbon, choose Picture and select the desired picture to add to the
- Right-click on the image and choose Format Picture. In the left-side settings, choose Alt
- Enter the description of the image in the Description region. Leave the Title field
- The image description should focus on the purpose and/or content of the image in the document.
Image descriptions in MS Word for Mac 2011
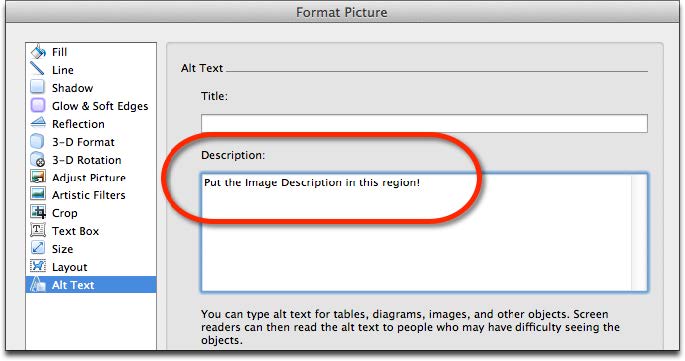 Screenshot of Format Picture window displaying the Alt Text interface for Description
region for Word 2011 for Mac.
Screenshot of Format Picture window displaying the Alt Text interface for Description
region for Word 2011 for Mac.
- Choose Insert > Photo > Picture from File… and select the image to add to your document.
- Right-click on the image and choose Format Picture. In the left-side settings, choose Alt Text.
- Enter the description of the image in the Description region. Leave the Title field empty.
- The image description should focus on the purpose and/or content of the image in the document.
Tables for Data
Tables should be used for information, not for controlling the layout or presentation of a MS Word document. To create a data table in MS Word, choose “Table” from the menu bar and select “Insert Table”. Identify the appropriate columns and rows and enter in the data for your table.
A simple data table is as follows:
| City | State | Zip Code |
| San Jose | California | 95101 |
| San Francisco | California | 94126 |
| Denver | Colorado | 80210 |
The first row of the table consists of the column headers. These help “define” the category of information for the data in that column. In MS Word, it is possible to identify the headings such that when the data table is interpreted by assistive computer technologies and read to the student, the information in the cells below each heading will have meaning and context.
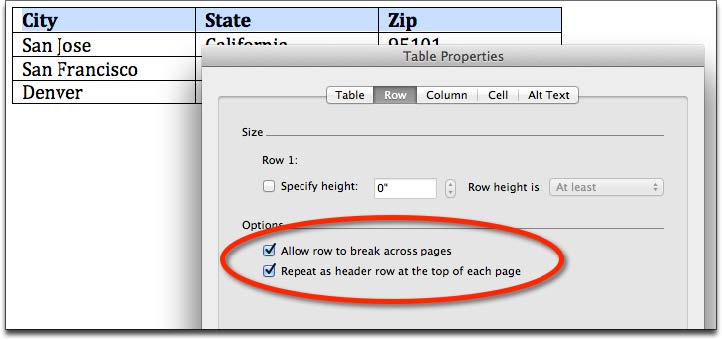 Screenshot of the table properties window with the row tab selected.
- Create your data table using the Insert Table option under Table on the menu
- Select (highlight) the first row of the data table with your column
- Right click in the highlighted area and choose the Table Properties
- Under the Row tab, check the checkbox Repeat as header row at the top of each page.
- Choose OK and return to the MS Word document.
At this time, there is only support for adding table heading information for table column headers, not row headers. This does not mean you are limited as to the types of tables you can create, rather this is a limitation in MS Word.
Multiple Columns
The Column tool provides the capability to create multi-column documents using MS Word. The advantage to using the Column tool is that multi-column documents will retain the proper reading order if using assistive technologies or when converting to other formats. Creating a multi- column layout using the tab-key, spacebar, or text boxes will result in an incorrect reading order and reflow of the document.
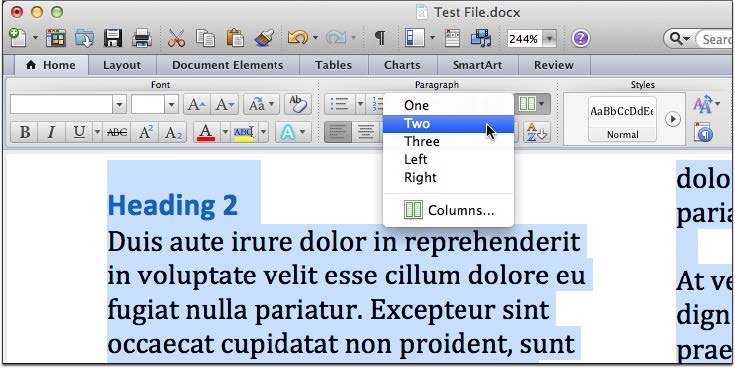 Columns in MS Word 2010 and Word for Mac 2011
- Select the text you wish to change from a single column to a multi-column
- Choose “Format” on the menu bar and select “Columns…”. Alternatively, choose the Column tool in the Home
- Select the number of columns or set your specific spacing requirements. Return to the document to review the new layout.
Document Hyperlinks
Documents containing hyperlinks to websites or other online resources can be improved by including hyperlink text that is understood by the reader. For instance, using the full hyperlink URL may not make sense to the reader without some context. You can modify the text to display in the document while retaining the hyperlink destination.
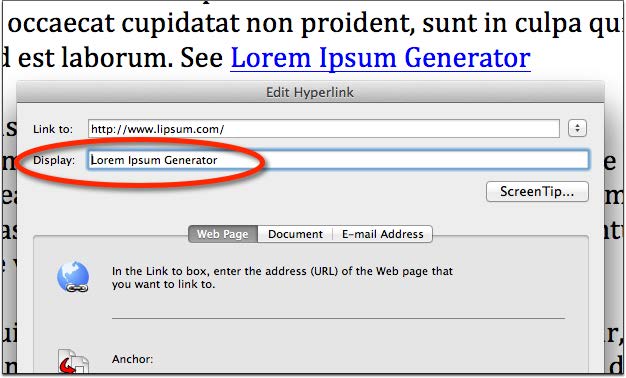 Edit Hyperlink tool in MS Word 2011 for Mac.
- Right-click on the hyperlink text in the document and choose Edit Hyperlink, or press Ctrl+K (Mac: Cmd+K).
- In the field “Display” (or “Text to Display” for MS Word 2010) enter the correct text
- You can include both the text description and full URL if you prefer. Using the full URL is helpful for when the document is printed.
Mathematical Content
Microsoft Word documents that contain math equations using the MathType Equation Editor can be converted into other formats while retaining the accessibility functionality of the mathematical content. At this time, MS Word documents must be saved as DOCX and use the MathType Equation Editor to input the math equations. Alternatively, you can input equations using LaTeX, but these equations will need to be converted to MathType Equations before the document can be used with assistive technologies or submitted to SensusAccess.
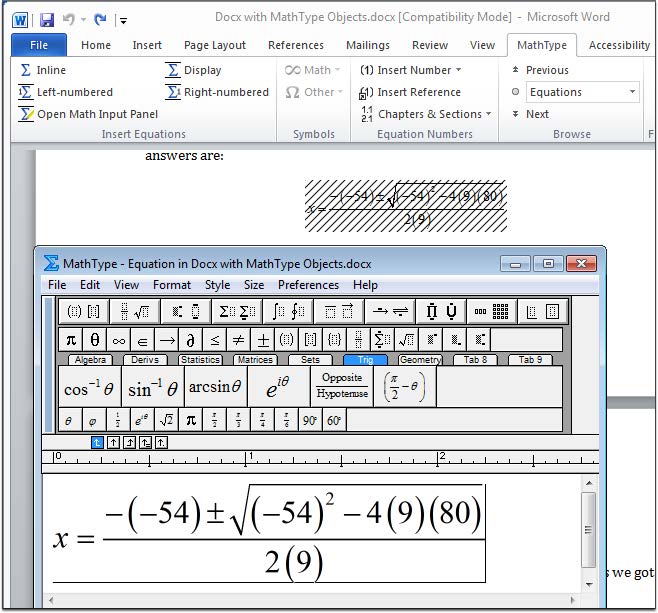 MathType Equation Editor in MS Word 2010
Key Points
- You will need to install the MathType Equation Editor from Design Science to support accessible math equations in MS Word documents. MathType is available for both the Mac and Windows platform.
- With MathType installed, you can enter equations using the MathType Equation Editor or by adding LaTeX. If using LaTeX, you will need to convert all equations to MathType
- MathType should be used for equations and not for entering text information. Avoid using MathType for formatting
- At this time, documents must be saved as DOCX in order to be converted into alternate formats using SensusAccess (e.g., DAISY+Math, EPUB 3, ).
- We are investigating additional input formats, including LaTeX and MathML, to support conversions into alternate document formats. Thank you for your patience.
Provided courtesy of Sean Keegan.